Have you ever hit “record” on your podcast or streaming session, only to be met with a surprisingly thin, almost-whispery sound that leaves you wondering if your microphone is secretly plotting against you? I remember the moment I realized my new USB microphone sounded more like a whisper than a professional voice. It was frustrating enough to make me question if I’d wasted dozens of dollars, or if my setup was doomed to sound amateur forever.
But here’s the truth—most of us aren’t missing out because of poor equipment alone. The way we set up and tweak our mics plays an even bigger role. Today, I’ll walk you through this common pitfall and promise to show you three straightforward fixes that made my voice sound fuller and more professional in no time. If you’re tired of your recordings sounding hollow and empty, stick around—your voice deserves better.
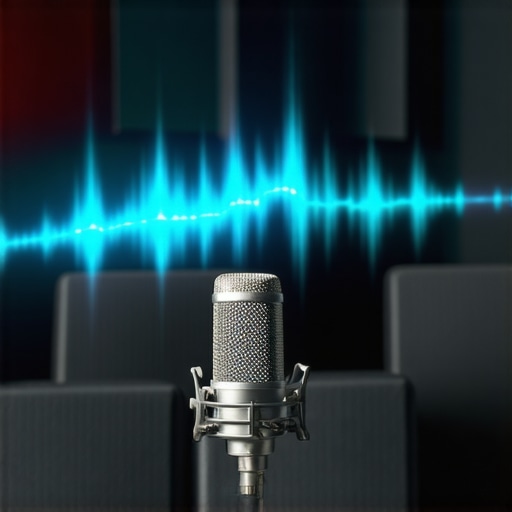
The Real Reason Your Microphone Sounds Thin (And How to Change That)
Is It Actually the Microphone, or Is It Us? The Biggest Myth About Good Sounding Podcasts
Early on, I bought into the hype that a fancy microphone alone would elevate my recordings. Turns out, I made a key mistake—expecting my gear to compensate for my poor setup. That’s like thinking a fancy paint job will fix a crooked wall. The truth is, the best mics in 2026 won’t sound their best if they’re not properly configured. For example, did you know that setting your gain too high or too low can utterly ruin your sound? I learned this the hard way, and it’s a mistake I see many beginners make. I recommend checking out this guide for tips on getting clean gain that beats dullness every time.
Now, I want you to think: Have you faced this problem with your own setup? If so, you’re not alone, and there’s a simple fix. But first, let’s address the core reason why your excellent microphone might still sound thin and fizzy, despite your efforts.
}#}#}#}#}#}#}#}{
Adjust Your Gain Properly
In my own experience, setting gain was the game-changer. I once spent an hour tinkering with equalizers before realizing I had the gain knob cranked too high, causing distortions. Think of gain like the volume of a water pipe—too high, and it causes splashes; too low, and the flow is weak. Start by turning your mic’s gain down to the lowest setting, then gradually increase it while speaking at your usual voice level, until your level meter consistently peaks around 75%. This prevents distortion and ensures your voice isn’t thin or fizzy. Check out the gain tips for more detailed guidance.
Optimize Your Microphone Position
Getting Closer Matters
When I first tried to record, I kept mic at arm’s length, resulting in that distant, echoey sound. Position your microphone roughly 2-3 inches from your mouth, speaking directly into the capsule. Imagine speaking into a cup—getting closer focuses your voice and reduces room echo. For streaming setups, use a microphone boom arm to maintain consistent proximity. Experiment by moving the mic slightly up or down to find the sweet spot where your voice sounds full and lacks harshness. Consider placing a foam panel behind you or use a reflection shield to minimize room reflections that dull your sound.
Implement Proper EQ Techniques
Once gain and positioning are dialed in, shaping your sound with EQ is critical. I applied a quick simple EQ tweak: boosting the low frequencies (80-120Hz) adds warmth, while reducing harsh high frequencies (>5kHz) eliminates sibilance. Visualize your voice as a garden—you want to nurture the bass and cut away the shrill weeds. Use a basic EQ plugin within your recording software, and make small cuts or boosts—massive adjustments can make your sound unnatural. For detailed EQ setups tailored for voice, check out the expert tips.
Balance Your Signal with Clean Power
Sometimes, a dull sound stems from a weak or noisy power supply. If you’re using an XLR microphone, avoid cheap or faulty audio interfaces that introduce hiss or dullness. I once upgraded my interface, replacing a budget model with a quality audio interface, which immediately improved my clarity and fullness. Keep cables tidy, avoid running XLR cables alongside power cords, and consider using a ground loop isolator if you notice humming. Proper grounding and quality power sources ensure your audio remains crisp and vibrant.
Test, Tweak, Repeat
Finally, the most crucial step is iterative testing. Record a short clip, listen critically, and adjust gain, position, or EQ settings as needed. In one messy session, I spent fifteen minutes adjusting while monitoring in real-time, which quickly revealed the specific tweak to fix my thin sound. Use headphones for real-time feedback rather than speakers, to catch subtle issues. When your voice sounds full, warm, and professional, you’ve cracked the code. Remember, excellent sound doesn’t come from equipment alone—it depends on your setup and adjustments.
Many content creators believe that simply owning a USB microphone guarantees professional-quality recordings. However, this assumption overlooks critical nuances that can make or break your audio quality. For instance, a common misconception is that all USB mics are inherently ‘plug-and-play,’ but in reality, there’s a wide range of quality and technical considerations that can profoundly impact your sound. Relying solely on the convenience factor often leads beginners to neglect important setup details such as gain staging and placement, resulting in thin or muffled audio even with the best hardware. To truly elevate your recordings, understanding these subtle yet vital aspects is essential.
Another widespread myth is that higher-end XLR microphones automatically deliver superior results in every environment. While professional-grade mics like the 2026 XLR models offer excellent potential, they demand precise handling, quality interfaces, and proper room acoustics. Without addressing issues such as gain staging or room treatment, even top-tier XLR gear can produce dull or flat sounds. Recognizing that equipment alone isn’t the magic solution is crucial for iterative improvement.
Do You Know Which Mistakes Undermine Your Audio Quality?
One insidious trap is the over-reliance on default presets within recording software. Many content creators believe that clicking the ‘auto’ setting or applying generic EQ presets will fix their sound. But this often results in a sterile, lifeless tone because these presets don’t account for your specific voice or environment. Instead, a tailored approach—such as strategic bass boosts or sibilance reduction—yields more natural and engaging results. For more insights on effective EQ techniques, check out this guide.

Furthermore, a common advanced mistake involves misunderstanding the interaction between microphones and audio interfaces or mixers. Many assume that high-quality XLR mics paired with any interface will produce stellar results. In reality, adjusting gain and ensuring proper power supply is critical to avoid dullness or hiss. Using inappropriate interfaces or neglecting proper grounding can introduce subtle noise, eroding the perceived quality. Recognizing these technical refinements separates amateur setups from professional-grade recordings.
Finally, a mistake that often trips up even seasoned podcasters is ignoring room acoustics. Treating your environment with simple solutions like diffusers, bass traps, or reflection shields can dramatically improve clarity and warmth. Without such acoustic optimization, even the most sophisticated mic can capture undesirable echoes or background noise, diminishing your overall audio impact.
It’s clear that mastering the nuances of voice recording, whether with USB or XLR gear, requires a deeper understanding of setup, environment, and processing beyond brand names. If you’re eager to refine your audio quality further, explore comprehensive guides such as this resource and learn how expert creators optimize their gear for pristine sound. Have you ever fallen into this trap? Let me know in the comments—sharing experiences helps everyone improve.
Maintaining Your Microphone Setup for Long-Term Success
Investing in quality podcast microphones and streaming gear is just the start. To ensure consistent, professional sound over time, regular maintenance and smart tool choices are essential. A well-maintained setup not only prolongs the lifespan of your equipment but also saves you money and headaches in the long run. In this section, I’ll share the specific tools and routines I personally rely on to keep my recording setup optimal.
Essential Cleaning Tools for Your Microphone and Accessories
Microphones, especially XLR microphones, can accumulate dust, saliva droplets, and other debris that impact sound quality. I regularly use a **microfiber cloth** to gently wipe down the microphone body and windscreen. For internal cleaning, a small, soft brush helps remove dust from mesh grills without damaging delicate components. Never use harsh chemicals; instead, opt for *generic electronics cleaning sprays* that evaporate quickly—that’s what I use to remove fingerprints or smudges without risking internal damage. For cables, I employ cable ties and Velcro straps to keep cords organized, preventing wear from tangling. Proper cable management reduces microphonic noise and physical damage—crucial for consistent recordings.
Tools to Protect and Preserve Your Sound Quality
Investing in a **shock mount** and **pop filter** is standard, but maintaining these accessories is equally important. I check my shock mounts every few months, tightening screws and ensuring the elastic is in good shape to dampen vibrations. For pop filters, a simple wash with mild soap and water every so often keeps them clean and free of odors. Additionally, I use **dehumidifiers** in my studio to control moisture levels, preventing corrosion of metal components and mold growth on acoustic treatment materials. These tools safeguard your investments and preserve recording quality.
Software Tools that Keep Your Setup Running Smoothly
Software maintenance plays a crucial role in longevity. I rely on **reliable driver updates** for my audio interface—preferably those from the manufacturer’s official site—to prevent driver conflicts that can cause audio glitches or dropout. Regularly updating your recording software and plugins ensures compatibility with your hardware and reduces bugs. I also use **audio optimization tools** like noise reduction plugins, which I tweak after each session. An often-overlooked practice is creating **backup profiles** for your audio settings and configurations—this way, if something gets corrupted, you can quickly restore your preferred setup without starting from scratch.
Predicted Trends in Long-Term Microphone Maintenance
Looking ahead, I believe that advances in **self-cleaning microphone fibers** and **smart maintenance sensors** embedded in gear will become commonplace. These innovations will proactively alert you to dust build-up, humidity, or mechanical wear before they impact sound quality. For example, some high-end microphones now include internal sensors that monitor temperature and moisture, which can be linked to your maintenance app—imagine receiving a notification that your microphone’s internal components need inspection. Staying ahead of these trends means investing in adaptable tools and routines now, such as regularly checking connections and cleaning components with proven cleaners like “Kaapi” sprays, which are designed for delicate electronics (see this expert guide). Try implementing a routine inspection schedule, and your setup will reward you with crystal-clear audio for many recordings to come.
The Hardest Lesson I Learned About usb microphone,voice recording,podcast microphone,streaming mic,xlr microphone
The most profound insight I uncovered was that even the finest gear can’t compensate for improper setup. I used to believe owning a top-tier microphone alone would deliver studio-quality sound, but I was mistaken. The real game-changer was understanding how crucial gain staging and positioning are—lessons learned through endless trial and error. This revelation taught me that mastery of setup nuances surpasses mere equipment investment.
3 Secrets the Pros Use to Sound Better
First, they meticulously calibrate gain to avoid dullness, tailoring it to their voice and environment. Second, they invest in acoustic treatments that many overlook—like bass traps or reflection shields—that drastically improve clarity. Lastly, they employ precise EQ tweaks, enhancing warmth and reducing harshness, which professional broadcasters swear by. These small but powerful adjustments transformed my recordings from average to compelling.
The Must-Have Resources for Deepening Your Audio Skills
To elevate your podcast game, I recommend checking out this detailed guide on modern microphone choices and setup strategies. For refining EQ techniques, these expert tips offer quick, actionable fixes. Also, exploring top voice microphones helps in selecting gear that truly matches your voice’s unique qualities, ensuring clear and warm recordings every time.
Take the Leap—Your Voice Deserves It
Achieving professional-quality sound isn’t reserved for the tech giants. With a curious mind, patience, and willingness to learn, you can unlock your own potential. Remember, every tweak, test, and adjustment gets you closer to that rich, full voice you’re aiming for. Don’t let uncertainty hold you back—embrace the journey, and let your authentic voice shine through.
What’s the biggest setup mistake you’ve been guilty of? Share your experiences below—your story might be the tip someone else needs to finally nail their sound!
This post really hits home for me. I initially thought upgrading my microphone would automatically improve my podcast quality, but I quickly learned that proper setup makes all the difference. Adjusting the gain was a revelation—once I lowered it and found the right balance, my recordings instantly sounded fuller and more professional. I also started experimenting with mic placement, and the difference in warmth and clarity was noticeable. One thing I find challenging is managing room acoustics; even with a great mic, echo and background noise can still diminish sound quality. I’ve started using reflection shields and foam panels, which seem to help a lot. For anyone just starting out, what are your go-to tips for controlling room acoustics without breaking the bank? It’s such a vital aspect of getting that studio-quality sound, yet often overlooked.