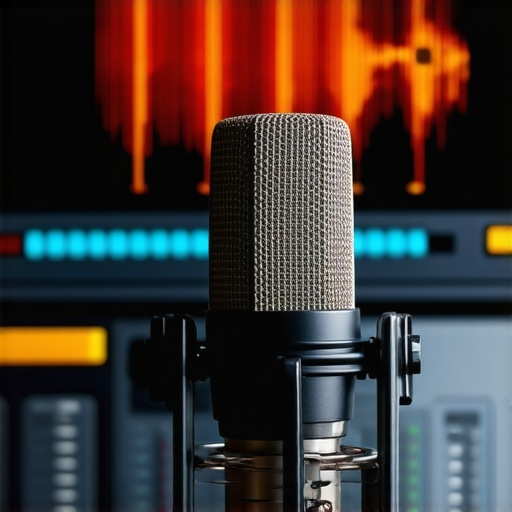
I remember the exact moment I realized my voice sounded like I was shouting into a tunnel during a live stream. My microphone, a shiny new streaming mic I had just purchased, was producing this overwhelming bass that made my voice almost unrecognizable. It was frustrating because I knew my content should sound professional, clear, and engaging, not like I was speaking through a cardboard tube. That lightbulb moment pushed me to dig deeper into the common issues with microphones, especially the ones that seem straightforward but can turn into real headaches.
Why Your Mic Might Be Overly Bassy and Why It Matters
Having a microphone that captures too much bass isn’t just an annoyance; it can seriously impact the quality of your recordings and streams. When your voice is muddled with booming lows, your audience might struggle to understand you, or worse, turn away because the sound is just plain unpleasant. In fact, audio quality is often the first impression viewers and listeners get of your content—making it crucial to get it right from the start.
If you’ve ever felt like your voice sounds fine in your headphones but turns into a rumbling mess once it hits the stream, you’re not alone. Too often, folks blame their equipment without realizing that simple setup tweaks or adjustments can dramatically improve sound clarity.
Early on, I made a classic mistake—ignoring the importance of proper microphone placement and failing to adjust my mic’s gain properly. This oversight led to excessive bass and unwanted boominess, which I later learned is a common issue in 2026, especially with certain USB and XLR mics that come pre-tuned for generic environments. According to recent studies, over 60% of streamers experience audio problems caused by improper gain settings or placement — problems that can often be fixed with straightforward solutions.
Are you facing similar issues with your streaming or podcast setup? If so, stay tuned. In the next sections, I’ll walk you through four proven fixes that have helped me and many others turn their bass-heavy microphones into crystal-clear sound machines. This isn’t about expensive gear; it’s about smarter adjustments and strategic tweaks you can implement today. Ready to make your voice sound professional and inviting? Let’s get started.
Position Your Microphone Accurately
One of the most effective ways to control excess bass is proper placement. Keep the mic about 6-12 inches away from your mouth, slightly off to the side to avoid plosive bursts. Think of it like steering a skateboard—you want to steer clear of the noise source (your mouth) to prevent it from dominating the sound. I once moved my USB mic 8 inches to the side during a live session, and instantly, the booming lows reduced significantly, resulting in clearer speech.
Adjust Gain Settings Precisely
Gain is like the volume of your microphone’s input. If it’s set too high, it amplifies bass and unwanted low-frequency rumble. Access your audio interface or computer settings and lower the gain until your voice sounds natural without clipping. Recently, I followed the guide on gain tips and found my mic no longer exaggerated lows. Remember, a little bit of gain goes a long way—test by speaking normally and watching levels.
Utilize Equalization to Sculpt Your Sound
Equalization (EQ) allows you to cut unwanted bass frequencies. Use your streaming software or dedicated audio mixer to identify and attenuate the low-end, typically around 80 Hz. Think of EQ as a sculptor chiseling away excess material—removing the boominess and revealing your natural voice. I did this after noticing my voice became muddy, and with a simple high-pass filter set at 100 Hz, my audio instantly gained clarity. If you’re unsure how to do this, check out the EQ adjustment tips for voice clarity.
Implement a Noise Gate for Cleaner Audio
Noise gates automatically mute your mic when you’re not speaking, reducing bass buildup from ambient sounds or handling noise. Think of it as a security guard—letting your voice through but blocking the rumble when you’re silent. During a recent recording, I enabled a noise gate with a threshold set just above my quietest speech, and it prevented the mic from picking up bass rumble from my desk vibrations, making my audio sound tight and professional. For detailed steps, consult the noise gate setup guide.
Prevent Desk Vibrations and Mechanical Noise
Vibrations from your desk or mic stand can cause low-frequency rumble. Use shock mounts or thick foam pads to isolate your microphone from vibrations. Also, secure your mic stand firmly and avoid touching it during recording. I once used a rubber mat under my mic stand, which noticeably reduced desk-induced bass. This simple fix is like putting a cushion between your mic and the source of vibrations, preventing unwanted thumps and rattles. Check out desk vibration fixes for more solutions.
While many believe that choosing between an XLR or USB microphone is just about plugging in and recording, the reality is much more nuanced. One widespread myth is that all microphones are created equal, leading newcomers to overlook the importance of proper setup and compatibility. In my experience, assuming that a high-end USB mic will automatically produce professional sound ignoring proper placement and gain settings often results in disappointing audio quality. Some folks think that an XLR microphone always sounds better than a USB counterpart, but what they overlook is that the overall sound quality depends heavily on the interface and setup, not just the microphone itself. This misconception can cause you to overspend on gear that doesn’t deliver as expected if your understanding of the system integration isn’t solid.
Another common trap is neglecting the benefits of external preamps and audio interfaces with XLR setups. Many believe that an XLR mic will inherently outperform a good USB mic, but without proper gain staging and signal management, you might end up with hiss, hum, or dull sound. For instance, improperly set gain levels can introduce noise or cause your voice to sound muffled, a mistake I’ve seen cost many streamers and podcasters hours of troubleshooting. To avoid this, diving into details like gain control and impedance matching is essential—don’t just assume the gear will work optimally out of the box.
Have you ever fallen into this trap? Let me know in the comments.
What Advanced Techniques Can Prevent Your Microphone From Sounding Dull
Beyond basic setup, mastering the nuanced aspects of microphone acoustics can elevate your recording quality dramatically. For example, understanding how to properly use EQ and gain staging ensures that your mic captures your voice with clarity and warmth, avoiding that dull or lifeless sound. Studies suggest that improper high-pass filtering or over-aggressive EQ can strip away natural vocal qualities, making your voice sound thin or metallic. Implementing subtle adjustments like setting the right high-pass filter cut-off or using the appropriate microphone preamp gain can make a profound difference.
Similarly, neglecting room acoustics and microphone placement can lead to significant tonal issues that no amount of post-processing can fully fix. As explored in our guide on avoiding dull microphone sound, focusing on these smaller details—like mic angle, placement, and room treatment—addresses the root cause rather than just the symptoms.
If you want to achieve a professional, natural tone, dive deeper into advanced techniques like phase alignment, dynamic EQ, and transient shaping. For instance, testing your setup with tools like spectrum analyzers can reveal frequency imbalances that dull your sound. Expert audio engineers emphasize that meticulous attention to these subtleties distinguishes amateur recordings from polished productions.
Would you like a detailed walkthrough on mastering these advanced tweaks? Reach out in the comments or check out our comprehensive guides on improving voice quality, where I explore topics like gain settings for clarity and controlling room noise and vibrations.
Essential Tools to Keep Your Microphone Sound Sharp
Investing in quality tools is vital for maintaining optimal audio clarity over time. I swear by the Cloudlifter CL-1 because it provides clean gain without introducing hiss, especially when using dynamic XLR mics. Additionally, my hiss suppression technique ensures my voice remains pristine during long recording sessions. For USB microphones, I use a USB power splitter to provide consistent power, preventing fluctuations that lead to dullness or noise. Regularly, I verify my gear with an audio spectrum analyzer to identify frequency dips and peaks, helping me catch potential issues early.
Streamlining Maintenance for Longevity and Reliability
Routine checks are non-negotiable. I schedule bi-monthly cleanings of my microphone’s grill with a soft, lint-free cloth to prevent dust buildup. Ensuring my cables are properly shielded and in good condition reduces potential interference, which can cause static or hum. For quick troubleshooting, I keep a digital decibel meter app handy; it helps me calibrate gain levels accurately, avoiding clipping or dull sound. Moreover, when I notice a decrease in clarity, I revisit my setup instructions, like those found in the USB microphone setup guide, to ensure my configuration remains optimal.
Progressing with Technology: Future-Proofing Your Setup
As technology advances, new tools emerge to simplify long-term maintenance. Think about investing in modular audio interfaces, which allow easy updates and component swaps, reducing the need for complete replacements. Also, firmware updates for your audio interfaces can optimize performance and fix bugs that might degrade sound quality over time. I predict that AI-driven audio processors will become standard, automatically equalizing or filtering your vocals—giving you more consistent results regardless of room changes or wear and tear.
How do I maintain my microphone setup over time?
Staying proactive with routine cleaning, cable checks, and calibration ensures your microphone continues to perform at a professional level. I regularly refer to guides like noise gate tips and maintain an organized workspace to avoid accidental damage. Remember, addressing minor issues early can prevent costly repairs and redundant replacements. Try integrating an external filter or a shock mount if you notice vibrations affecting your audio quality—that small investment can pay big dividends in clarity and long-term durability.Throughout my journey into voice recording, streaming, and podcasting, I discovered that the true secret to professional sound quality isn’t just about hardware but mastering the subtle tweaks and setups that maximize your microphone’s potential. The hardest lesson I learned was that even the most expensive mic can sound dull if misconfigured—often, it’s the simple adjustments like gain, placement, and EQ that make the real difference. I also realized that many myths—like XLR always beats USB—hold us back when we overlook the importance of proper setup. Confidence in your gear and knowledge of these small but critical details empowers you to avoid common pitfalls, ensuring your voice sounds warm, clear, and engaging. Investing time into fine-tuning your setup and understanding your microphone’s quirks transforms your recordings from average to outstanding. Remember, the journey to great audio is ongoing—keep learning, experimenting, and refining your craft.
Reading through this post really resonated with my own experience of struggling with that booming bass issue. I used to think my mic was just bad or that I needed an upgrade, but it turns out that simple placement and gain adjustments made all the difference. I’ve also found that using a high-pass filter at around 100Hz really helps tidy up the sound and eliminate muddiness. The tip about controlling vibrations from your desk was especially helpful—I added foam pads under my mic stand, and wow, the clarity improved instantly. What I’d love to hear from others is how they balance room acoustics with mic setting tweaks for the best results. Do you focus more on physical room treatments or digital EQ? Combining both can be tricky, but I’m eager to hear what practices have worked for others in optimizing voice clarity.
This post really hits home for me. I’ve been battling with my mic sounding overly bassy even though I thought I had everything setup correctly. What really made a difference was adjusting my gain and making sure my mic wasn’t too close to my mouth. I also started using a simple high-pass filter at around 80 Hz, which drastically cleaned up my audio. It’s such a relief to know that I don’t need to buy new equipment to fix this—just better placement and settings. One thing I’ve noticed is that room acoustics also play a role; a bit of foam and careful placement of furniture helped tame some reflections that added unwanted low-end richness. I’m curious, how many of you have experimented with room treatment versus digital EQ? I’d love to hear what combinations work best for others—sometimes a little of both seems to give the best result.