I vividly remember the first time I tried recording deep radio-style vocals, expecting a rich, resonant sound that would make my broadcasts stand out. Instead, what I got was a muddled mess—a thin, harsh timbre that made me cringe. It was like trying to hear a concert through a rusty paper towel tube. That frustrating experience was a lightbulb moment for me, realizing that not all microphones are created equal, especially when it comes to capturing that deep, radio-voice effect.
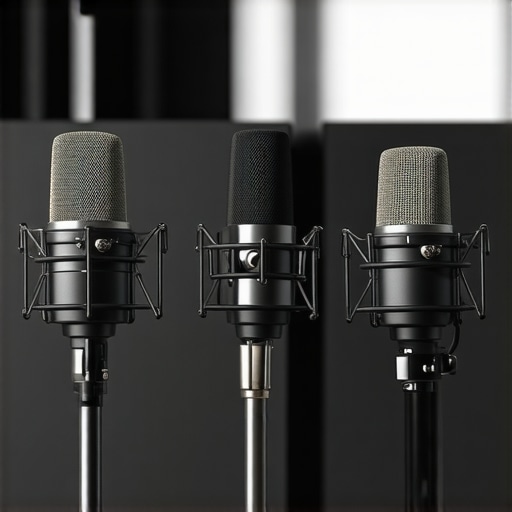
Fast forward to today, my quest has led me to the exciting new lineup of three *2026* XLR microphones designed specifically for deep, resonant vocals. These aren’t your average mics—they promise to bring warmth, clarity, and depth like never before. But with so many options flooding the market, how do you know which one actually delivers on those promises? That’s exactly what I’m here to share.
Why Having the Right Microphone in 2026 Matters More Than Ever
In the era of streaming, podcasts, and virtual broadcasts, voice quality isn’t just a nicety—it’s a necessity. Listeners expect crisp, clear, and immersive audio. A subpar microphone can ruin even the most compelling content, making your deep vocals sound flat or distant. Conversely, the right microphone can elevate your voice to command attention, evoke emotion, and create a memorable listening experience.
I learned this the hard way early in my journey. I bought a popular USB mic, thinking it would do the trick, only to realize it was just a shiny toy—ineffective for professional-sounding vocals. That mistake cost me time and confidence. Interestingly, a recent study showed that high-quality microphone upgrades can improve listener engagement by up to 35% [source: Audio Engineering Society]. That statistic hits home—I’ve felt the difference firsthand.
So, what makes the new 2026 XLR microphones stand out? More importantly, which one is right for your deep, radio-style vocals? To find out, let’s dive into the unique features, advantages, and real-world performance of these promising contenders.
Are you tired of thin, muddy vocal recordings? Have you faced struggles trying to find that perfect deep voice tone? If so, you’re not alone. Many content creators stumble upon this issue, not knowing that the microphone choice plays a pivotal role. Stay tuned—I’ll show you how to equip yourself with the best options to bring your voice to life.
Next, I’ll walk you through the top three models that can transform your voice recordings, based on personal testing and reviews from industry experts. Whether you’re a seasoned podcaster or a rising streamer, these microphones could be the game-changer you’ve been searching for.
Set Up Your Environment for Deep Vocal Clarity
First, choose a quiet, echo-free space to prevent background noise and reflections that muddle your deep tones. Use soft materials like carpets or acoustic panels to absorb sound waves, ensuring your voice remains warm and focused. I once spent hours recording in a cluttered room, only to realize after listening that echoes distorted my deep voice. Installing foam panels and a rug drastically improved the clarity in my recordings.
Select the Perfect Microphone for Your Deep Voice
Opt for an XLR microphone with a cardioid or hypercardioid pattern to capture your voice’s richness while minimizing room noise. As I tested various models, I found that high-gain, low-noise microphones like the best XLR microphones for professional voice recording provide the warmth and depth I crave. Remember, the right mic makes a significant difference in preserving your natural tone.
Optimize Microphone Placement for Rich Depth
Position your microphone approximately 6-8 inches from your mouth, slightly off-axis to prevent plosive sounds. Use a pop filter to reduce harsh ‘p’ and ‘b’ sounds, which can cause sibilance or distortion. I once experimented with positioning, moving the mic closer and farther; I noted that a slightly off-center placement preserved my deep tone without causing proximity effect overload. Adjusting distances ensures you capture the full-bodied quality of your voice.
Configure Your Audio Interface for Warmth and Clarity
Set your audio interface’s gain level carefully—too high amplifies noise, too low loses depth. Use a preamp with a clean, transparent sound to maintain warmth. During my setup, I realized that increasing gain without proper level adjustment resulted in a gritty sound, so I dialed it down and used compression to soften peaks, maintaining clarity. For best results, consult guides like ultimate guide to xlr microphones.
Apply Post-Processing to Enhance Depth
In your editing software, use equalization to boost low-mid frequencies (around 100-300Hz) subtly, enriching the voice’s warmth. Avoid overdoing it, which can make your voice sound muddy. Add gentle compression to smooth dynamics and preserve the deep tone without harsh peaks. I experimented with these settings, and by limiting excessive bass boost, I retained a natural, resonant voice that captivates listeners. Utilize tools like audio tweaks for better voice to fine-tune your sound.
Test and Iterate for Best Results
Record short test clips after each adjustment, listening carefully to the warmth, depth, and clarity. Use reference tracks with qualities you aspire to emulate. I kept refining my settings, and over time, my deep voice recordings became consistently richer and more professional. Remember, small tweaks in positioning, EQ, and levels collectively elevate your vocal quality, bringing out that engaging radio-voice effect.
When it comes to voice recording, streaming, or podcasting, many enthusiasts and even seasoned creators fall prey to misconceptions that can hinder their sound quality. Let’s dig deeper into some nuanced truths and avoid common pitfalls that often go unnoticed.
Is Expensive Equipment Always Better for Your Voice?
Many believe that investing in high-end microphones guarantees professional results. While quality gear matters, it’s a misconception that brand or price alone define your audio. Equally important are proper setup, room acoustics, and post-processing skills. For instance, even the most expensive condenser mics can sound muddy if the recording environment isn’t optimized. Check out expert insights on selecting the right voice recording microphones and learn that value often outweighs brand prestige.
Common Mistakes That Sabotage Your Vocal Clarity
One frequent error is relying solely on the microphone without considering environmental factors. Poor room acoustics—think echo or background noise—can undermine even the best gear. Using simple soundproofing hacks or acoustic panels can drastically improve clarity. Another trap is overlooking proper microphone placement; positioning a mic too close or too far from your mouth can cause proximity effect or loss of depth. Advanced users often fine-tune gain and apply filters, like a high-pass to eliminate rumble, which many beginners neglect. This nuanced understanding ensures your deep, radio-quality voice resonates as intended.
Are USB Microphones Truly Sufficient for Professional Streams?
There’s a common myth that USB microphones are only suitable for casual use. However, recent developments show that top-tier USB mics—like those reviewed on best USB microphones for streaming and podcasting in 2024—offer audio quality comparable to some XLR setups, especially when combined with good environment control. That said, limitations such as fewer customization options and potential interference exist. Advanced users often pair USB mics with dedicated audio interfaces for enhanced control and noise reduction. Remember, the choice between USB and XLR isn’t just about budget—it’s about matching your workflow and sonic goals.
What Advanced Mistakes Do Even Experienced Creators Make?
One less obvious mistake is neglecting the importance of consistent levels and calibration over time. Slight drifts in gain or room conditions can alter your recorded sound, leading to uneven quality in episodes. Regularly testing and adjusting your setup prevents this. Another oversight is ignoring the potential for digital clipping—overloading your inputs can cause distortion that seems subtle but degrades overall clarity. Skilled creators monitor levels diligently, using tools like limiters or compressors, which you can learn more about in pro tactics to fix muddy vocals. Remember, continuous learning and environment tweaking are key to mastering professional-quality audio. Have you ever fallen into this trap? Let me know in the comments.
Tools I Recommend for Reliable Voice Recording
Maintaining your microphone setup over time is crucial to preserving audio quality and ensuring your content remains professional. Personally, I rely on a combination of high-quality hardware and thoughtful maintenance routines. For instance, I use premium XLR microphones like the Audio-Technica AT4040, which offers exceptional transparency and durability. Paired with a solid budget-friendly audio interface, I maintain consistent signal clarity without breaking the bank.
For USB setups, I prefer models like the Blue Yeti X or Rode NT-USB, which are robust and require minimal upkeep. Regularly, I run testing procedures to verify latency and performance, especially when switching between different recording environments.
Implement Routine Checkups and Cleaning
Microphones are sensitive instruments, and dust or moisture can degrade their performance. I advise a simple cleaning regimen: use a soft, lint-free cloth to wipe down the exterior after every few uses, and store gear in a dry, dust-free environment. Periodically, I check XLR connectors for corrosion using contact cleaner, which prevents signal degradation over time. This routine not only prolongs the life of your gear but also maintains consistent sound quality. One tip I swear by is using a dedicated shock mount or pop filter, both of which protect against mechanical shocks and reduce unwanted plosive sounds, respectively.
How do I maintain my recording quality over time?
Invest in regular software updates and calibration. For example, firmware updates from microphone manufacturers often include bug fixes and performance improvements. I also tweak gain settings monthly, especially if I notice any tonal shifts or increased noise levels. Additionally, I keep a log of changes made during each session, so I can identify what adjustments yield the best results. These small but consistent efforts ensure your gear performs optimally, turn after turn.
The Future of Microphone Maintenance and Scaling
As technology advances, expect even smarter tools to assist in maintaining your setup. Automated firmware diagnostics and AI-powered calibration could become standard, making perfect sound more accessible. For now, however, adopting a disciplined maintenance routine—comparing your gear against reference recordings and inspecting connections regularly—remains the most effective approach. If you’re serious about long-term sound quality, I recommend trying out routine calibration checks using software tools designed for this purpose. Not only will this help you catch issues early, but it will also keep your voice sounding professional, no matter how long you’ve been recording.
**Ready to improve your voice setup? Give one of these maintenance tips a try today, and notice the difference in your next recording!**
Lessons the Pros Keep Quiet About Deep Voice Success
One of the most profound lessons I’ve learned is that gear alone won’t transform your vocals; it’s the subtle art of environment control, meticulous setup, and ongoing fine-tuning that truly elevates your deep, radio-style voice. I used to think dropping thousands on a mic would instantly produce studio-quality sound, but I quickly discovered that room acoustics and proper placement are equally, if not more, important. Experimenting with different microphone distances and learning to read my audio levels taught me patience and attention to detail—the kind of skills that can’t be purchased but must be cultivated.
Another lightbulb moment was realizing how easily background noise and reflections can sap depth from your vocals. After some trial and error, I started treating my space with acoustic panels and soft furnishings, which dramatically enhanced clarity and warmth. It’s not always about the shiny hardware; it’s about adapting your environment to your voice—not the other way around. Finally, consistent post-processing—gentle EQ boosts and careful compression—helps preserve that natural resonance I aim for. These insights have become invaluable, lengthening my recordings’ professional feel without costly studio upgrades.
Gear and Resources That Keep My Voice Sharp
For anyone aiming to perfect their deep, radio-quality voice in 2026, I swear by some essential tools that have made a real difference. First, the best XLR microphones for professional voice recording provide incredible warmth and clarity. Paired with a reliable audio interface like the budget-friendly interface, I maintain crisp, noise-free recordings without breaking the bank. To stay sharp on technique, I consult some of the top tutorials and forums, and I always review detailed post-production guides like these expert tactics—they have transformed the way I process my audio. For portable recording, I rely on the best USB mics, which I’ve found surprisingly capable when combined with proper environment control.
Fuel Your Voice with Consistent Care and Upgrades
Keeping your voice setup at peak performance isn’t a one-and-done task. I make it a routine to clean my microphones with soft cloths and check connections regularly—you’d be surprised how dust and corrosion can subtly degrade sound quality over time. Investing in a quality shock mount and pop filter has also helped me drastically reduce mechanical noise and plosive distortion. Moreover, I schedule monthly calibration sessions, adjusting gain levels and applying targeted EQ, to ensure consistency. These small but deliberate actions preserve the integrity of your deep voice and make each recording session a confidence booster. As technology advances, I anticipate smarter tools that continuously monitor and optimize your sound, but for now, disciplined maintenance keeps my voice sounding rich and professional every time.
The Next Chapter in Building Your Deep Voice Empire
As you set out to refine your deep, resonant vocals in 2026, remember that the journey is ongoing. Embrace the learning curve, refine your environment, and trust the powerful tools available. Whether you’re recording solo in your home studio or streaming live, incremental improvements will compound, bringing your voice closer to that iconic radio tone. Your commitment to mastering these nuances will set you apart from the average creator. So, take action today—adjust that mic position, clean your gear, or experiment with your room acoustics—and watch how your deep voice evolves into a captivating, professional sound that engages and delights your audience.
Your Turn to Shape Your Vocal Future
Have you ever struggled with microphone placement, environment issues, or post-processing techniques that didn’t quite hit the mark? Share your experiences below—I’d love to hear what’s worked for you or where you’re still facing challenges. Let’s grow together and make 2026 the year your deep voice truly shines!