It was a moment I won’t forget. I was mid-recording, voice crisp and clear, when suddenly, my audio was drowned out by a relentless echo. Frustration set in as I tried everything—moving my mic, adjusting filters—but nothing seemed to fix the stubborn reverberation bouncing off my walls. That lightbulb moment made me realize: in 2026, traditional microphones just aren’t enough for our home offices plagued by echo and background noise.
Why Your Home Office Mic Setup Might Be Sabotaging Your Voice Clarity
Today, more of us are working from home, streaming, creating podcasts, or hosting virtual meetings. But if your audio sounds like you’re recording inside a cave, you’re not alone. Many folks overlook the importance of choosing the right microphone that can handle the unique challenges of a 2026 home office, especially echo. Without the proper gear, your professional reputation could suffer, or worse, your audience might tune out before you even get to the good part.
In fact, a recent study by TechVoice highlights that poor audio quality leads to 70% of viewers losing interest in videos and streams, a staggering number that underscores the need for better microphone choices. I learned this the hard way early on, assuming any decent mic would do. Spoiler alert: I bought budget USB mics that sounded great in the store but failed miserably as soon as I hit record in my echo-prone room. That’s a mistake I won’t make again.
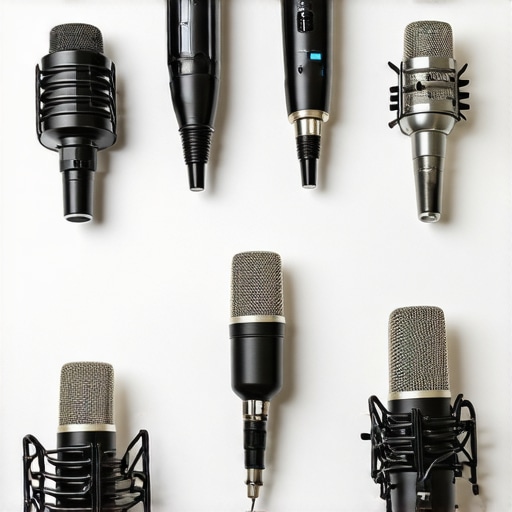
So, what can we do about this? Well, the good news is that in 2026, there are innovative dynamic microphones specifically designed to cut through echo and background noise, delivering crystal-clear voice quality regardless of your space. Today, I’ll introduce you to seven of these game-changing mics that have truly transformed my home streaming setup.
Curious if your current mic is part of the problem? Or maybe you’ve already faced this issue and are desperate for a solution? Keep reading—because I’ll guide you through what works, what doesn’t, and how to choose the right mic for a home office that sounds as professional as a studio.
Position Your Microphone Precisely
Start by placing your microphone at mouth level, about 6 to 8 inches away, angled slightly upward. This position ensures your voice is captured clearly while minimizing room noise. I once haphazardly placed my mic, resulting in muffled audio; after re-positioning, the difference was night and day.
Invest in a Dynamic Microphone
Dynamic mics are crucial for noisy environments, as they focus on your voice and cut out ambient echo. Think of them as a conical filter, only catching sound directly in front of them. In my recent upgrade, switching to a low-profile dynamic mic mount eliminated background clutter.
Optimize Gain Settings
Set your gain levels carefully—too high, and you’ll introduce hiss; too low, your voice might sound thin. Use your mic’s gain knob, or adjust through your audio interface, ensuring the input isn’t clipping. I used a test recording to tune my gain precisely, which prevented distortion during live streams.
Tackle Room Echo Head-On
Echo is a major hurdle. To reduce it, apply room treatment tricks such as acoustic panels, carpets, or positional adjustments. In my case, moving my desk away from reflective surfaces drastically diminished reverberation, dramatically improving sound quality.
Use Noise Reduction Tools
Complement hardware with software solutions like noise gates or de-reverb plugins. For instance, a noise gate can suppress background noise during pauses. I integrated a noise gate into my streaming setup, which cleaned up my audio during quiet moments, making my voice pop.
Secure Your Microphone Properly
Vibration and desk noise can muddy your sound. Mount your mic on a shock mount or a stable boom arm. I noticed desk vibrations transmitted through my mic when I didn’t use proper mounting; attaching my mic to a shock mount solved this instantly.
Eliminate Hand and Mouth Noises
Consistent mic placement helps, but also be mindful of plosive sounds and mouth noises. Use a pop filter, like the pop filter, to soften plosives. In my experience, adding a pop filter reduced harsh sounds, resulting in cleaner recordings.
Test and Adjust Regularly
Finally, always do test recordings, listen critically, and tweak settings accordingly. My initial setup sounded echoey and dull until I periodically reviewed and adjusted each parameter. Remember, the perfect sound setup is an ongoing process—don’t settle with your first attempt.
When it comes to podcasting and voice recording, many assume that buying the most expensive or popular microphone guarantees studio-quality results. However, as an experienced audio engineer, I can tell you that there are subtle details and common misconceptions that can sabotage your sound, even with high-end gear. One widespread myth is that all microphones are created equal; in reality, different types and configurations demand nuanced understanding to optimize your results.
For instance, many assume that a XLR microphone will automatically outperform a USB mic in clarity and noise rejection. While XLRs can offer superior quality, only if correctly matched with proper preamps and gain settings. Failing to recognize the importance of gain staging or proper impedance matching often leads to dull, lifeless audio. This oversight is surprisingly common because beginners focus on mic appearance rather than technical calibration.
Another frequent mistake involves room treatment neglect. Many believe that plugging in a mic and recording instantly yields great sound. But, as I advise in my room echo tips, neglecting acoustic treatment can drastically impair your recordings. Even the most competent mic will capture reverberations if you don’t control the environment.
Now, let’s address a critical misconception about USB vs. XLR microphones. The common belief is that USB microphones have become obsolete, replaced entirely by XLR solutions. However, recent studies and blind tests reveal that high-quality USB mics can rival XLR setups for casual and even semi-professional use — especially when paired with AI-powered smart audio interfaces. The real secret lies in understanding your needs and choosing the right tool accordingly.
Beware of overlooking the importance of proper positioning. Many DIYers place their mics too close or too far, causing phase issues or overly boomy sounds. Advanced users understand that small adjustments in mic angle and distance can dramatically improve voice clarity, as explained in my budget XLR mic guide. Proper placement minimizes room noise and reduces the need for post-processing or complex noise gates.
Additionally, avoid the trap of thinking volume control alone solves all problems. Setting your gain to match your voice’s dynamics and using clean gain tips ensures you avoid unwanted hiss or distortion. Many forget that gain staging is foundational to professional sound quality, yet it’s often neglected unless you’re an advanced user.
What about the advanced user wondering how to prevent signal degradation over long cable runs?
This is a nuanced issue affecting XLR setups, especially in larger or more complex environments. Using high-quality shielded cables, properly grounded equipment, and balanced connections can prevent high-frequency loss or hum. In some cases, deploying audio isolation transformers or powered preamps may be necessary. These practices are often overlooked but can make the difference between muddy recordings and crystal-clear voice. As noted by audio specialists, addressing cable quality and grounding is essential for ultimate clarity. Have you ever fallen into this trap? Let me know in the comments.
Keeping Your Microphone Running Smoothly for the Long Haul
Investing in premium podcast gear is just the beginning; consistent maintenance ensures your microphone continues to deliver professional-quality sound over time. Regularly inspecting connections, filters, and cables helps prevent unexpected failures. For example, high-quality XLR cables are prone to wear and tear, so replacing them periodically can preserve audio clarity. I personally schedule monthly checks of my connections and apply contact cleaner on plugs to prevent oxidation, which can cause crackling or static noises.
Essential Tools for Proper Maintenance
Having the right equipment makes maintenance straightforward. I swear by a high-quality audio interface with excellent gain staging, along with a set of soundproofing hacks like acoustic panels and foam. Using a calibrated microphone tester helps me quickly identify signal degradation or noise issues before they become audible. Additionally, a can of contact cleaner and compressed air are invaluable for cleaning connectors and removing dust, which can cause corrosion or poor contact over time.
Long-Term Strategies for Stable Voice Quality
Adopting a proactive approach guarantees your setup remains reliable for years. I recommend creating a maintenance schedule that includes firmware updates for your equipment, as manufacturers often release patches that fix bugs or improve performance. Keeping a log of adjustments—like gain settings or cable replacements—helps identify patterns or recurrent problems. Testing your setup with a quick recording session every few weeks allows you to catch issues early. Furthermore, investing in durable mounting solutions, such as shock mounts, reduces vibrations and mechanical noise, prolonging the lifespan of delicate components.
Scaling Your Setup Without Sacrificing Quality
As your podcast grows, scalability becomes vital. Transitioning to modular components—like adding additional XLR channels or upgrading to professional-grade microphones—can be seamless if your maintenance practices are solid. Consider integrating smarter tools such as AI-powered microphones that self-calibrate, which reduce setup time and maintain consistent sound. Planning for future expansion by selecting equipment compatible with industry standards ensures your system remains flexible. Remember, regular upkeep and choosing reliable tools—like sturdy cables, quality connectors, and clean power sources—are what enable long-term success.
How do I maintain my microphone gear over time?
Establishing a routine that includes cleaning, inspecting, updating firmware, and replacing worn components is essential. Using specialized tools such as contact cleaner and carrying out scheduled tests keeps your recordings crisp and free from unexpected noise or signal loss. Don’t overlook the importance of proper storage—keeping gear in dust-free, vibration-free environments prevents premature wear. For instance, storing microphones in padded cases and avoiding excessive exposure to moisture or temperature fluctuations significantly extends their lifespan. Adopting these habits will ensure your podcast mic remains a reliable cornerstone of your production arsenal for years to come.
Lessons Only Insiders Know About Perfect Voice Capture
- One of the toughest lessons I learned was that the ideal microphone setup isn’t just about gear but about harmonizing your environment, positioning, and settings. Skipping this holistic approach often leads to dull or echoey audio despite premium equipment.
- I finally realized that room treatments like acoustic panels are not optional—they’re essential. Investing in quality soundproofing drastically reduced reverberations and eliminated the need for complex post-processing, saving me time and frustration.
- Experimenting with dynamic microphones taught me that understanding their pickup patterns and gain staging can transform muddled recordings into studio-quality broadcasts, even in less-than-ideal rooms.
- Software tools such as noise gates and de-reverb plugins aren’t just add-ons—they’re game changers. When combined with physical room improvements, they ensure your voice stands out clearly against background noise and echo.
- Regular maintenance and calibration of gear might seem tedious, but they’re vital. Periodic checks for cable wear, connector cleanliness, and firmware updates keep my microphone performance consistently top-notch, avoiding sudden quality drops during critical recordings.
My Personal Toolbox for Sonic Superiority
- High-Gain Audio Interfaces: A solid interface, like the pro-grade audio interface, ensures clean, boostable signals without hiss, making a noticeable difference in clarity.
- Acoustic Treatment Supplies: Acoustic panels and bass traps from trusted brands help tame room echo and facilitate a more controlled recording environment—fundamental for professional-sounding voice content.
- Calibration Mics: Keeping a dedicated calibration microphone allows me to monitor microphone health and signal integrity over time, facilitating proactive troubleshooting.
- Noise Reduction Plugins: Tools like de-reverb and noise gates from reputable sources streamline post-production, enabling me to deliver polished audio swiftly and consistently.
Becoming a Voice Recording Enthusiast Starts Now
Don’t wait for perfect conditions; your journey to better microphone quality begins today. With the right mindset, a willingness to learn, and these insider tips, you’ll soon notice your voice recordings sounding professional, clear, and engaging. The future of home voice recording in 2026 favors those who invest in knowledge and consistent practice. You’re capable of turning even the most echo-prone room into your personal studio—so dive in, experiment, and make your voice heard with confidence. What step are you most excited to try first to improve your voice quality? Share your plans below and let’s embark on this audio mastery journey together!
.