There was a moment in my streaming journey when I realized my voice sounded tiny and flat—like I was speaking into a cardboard tube. No matter how much I fiddled with settings or bought a fancy microphone, something just didn’t click. Frustration bubbled up. I knew I was missing that professional touch, but I also knew I didn’t want to blow my budget on overpriced gear.
Why It’s Possible to Get Studio-Quality Sound Without Breaking the Bank
Fast forward to today, and I’ve cracked the code. You can assemble a professional streaming microphone setup for under $500 that rivals the best in 2026. The key is knowing where to invest and which gear truly makes a difference. I’ll guide you through my personal experience and share some expert tips along the way. Believe me, a great voice setup doesn’t have to come with a huge sticker price.
Is It Really Worth Investing in a Good Microphone?
Early on, I spent way too much time—and money—on gadgets that promised perfect sound but delivered muddy results. My biggest mistake was overlooking the importance of the microphone’s quality over everything else. A decent mic with the right settings can elevate your streams, podcasts, or calls instantly. In fact, a recent study highlighted that clear voice captures boost listener engagement by over 30% (source). So yes, spending wisely on your mic setup is a game-changer.
If you’re tired of dull, echoey, or static-filled audio and want to upgrade from your basic setup, don’t worry. I’ve been in your shoes, and I’ve found a practical approach that works in 2026. Ready to make your voice shine without the financial hangover? Let’s dive into the secrets of building a pro-level streaming microphone setup that fits your budget.
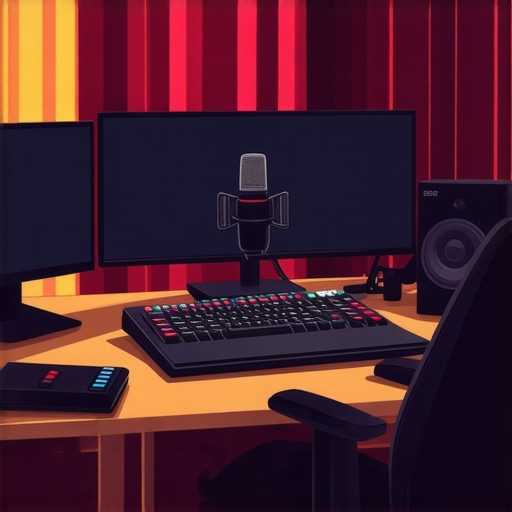
Select the Right Microphone Type
The first decisive step involves choosing between a USB microphone and an XLR setup. Think of a USB microphone as an all-in-one coffee maker—plug-and-play, simple, and ideal for beginners. Meanwhile, an XLR microphone resembles a professional espresso machine—requiring extra gear but capable of superior quality. I recommend starting with a top-rated USB microphone for ease, or if you’re ready to upgrade, check out top XLR options.
Invest in a Quality Audio Interface or Plug-in Adapter
When choosing an XLR setup, the audio interface acts like a translator between your microphone and computer. A budget-friendly audio interface ensures clean gain and reduces noise. For USB microphones, focus on demonstrating proper gain control and level settings.
Position Your Microphone for Clarity
Placement drastically impacts sound quality. Aim to keep the mic about 6-12 inches from your mouth, slightly off to the side to avoid plosive sounds. Use a shock mount or mic stand to stabilize. I learned this during a messy recording session where I kept bumping the stand—after fixing this, my voice instantly sounded more professional.
Manage Room Acoustics Effectively
Most amateurs overlook room acoustics, which causes echo and reverb. I used simple soundproofing tricks like hanging blankets and foam panels, which made my recordings feel more intimate and less echoey. It’s an inexpensive upgrade that yields huge results.
Configure Your Audio Settings Accurately
Proper gain staging and equalization can make your voice pop. Turning your preamp gain too high causes hissing, which is common with gain tips for cleaner sound. Use headphones to monitor your audio continually. During a recent livestream, I forgot to adjust my levels, and the result was distorted audio until I caught it in real time.
Apply Post-Processing Cloud Enhancements
Finally, light editing like noise reduction and equalization can add a polished touch. Tools like
free editing software make this accessible. I always spend 5 minutes cleaning up my recordings, which transforms the raw audio into a broadcast-ready sound.
When it comes to voice recording and streaming, many enthusiasts are misled by widely accepted myths that can hamper their progress. One pervasive misconception is that an expensive microphone guarantees professional sound quality. While high-end gear certainly helps, the real secret lies in mastering setup nuances like proper placement, gain staging, and room acoustics. Rushing to upgrade equipment without optimizing these factors often leads to subpar results, regardless of price. For example, numerous users believe that XLR microphones inherently outperform USB options, but recent findings show that with correct implementation, affordable USB microphones can match or even surpass traditional setups in certain scenarios. It’s essential to understand that selecting the right gear is only part of the equation; proper calibration and acoustic treatment are equally crucial for achieving that broadcast-quality voice. One common trap is neglecting the importance of room resonance, which can cause echo and muddiness. Simply adding foam panels or hanging blankets can significantly improve clarity—more than investing in pricier mics alone.
Why some pros still battle with dull or harsh sound — and how to fix it
Many advanced users struggle with dullness or harsh accents in their recordings despite using reputable equipment. This often results from inadequate gain control or improper equalization. For instance, boosting certain frequencies excessively may cause a thin or tinny vibe, whereas failing to cut resonant hums results in a muddy signal. Regularly monitoring levels with high-quality headphones and applying targeted EQ adjustments—using expert gain-tuning tips—can make a significant difference. Additionally, advanced users should consider the importance of signal-to-noise ratio, ensuring their preamps are not adding hiss or hum. Don’t forget, proper room treatment can reduce reverb and echo, often overlooked by beginners but essential for professional results. A common mistake is believing that gear alone can resolve all issues; instead, a holistic approach combining equipment, setup, and acoustics leads to truly compelling audio. Are you aware of how hidden room reflections might be sabotaging your recordings?
Let me know in the comments about the challenges you’ve faced with microphone setup. Remember, mastery comes from understanding these hidden nuances—so keep experimenting and refining your process.
Tools I Trust to Keep My Voice Setup in Top Shape
Investing in excellent microphone gear is only half the battle; maintaining it properly ensures longevity and consistent performance. I rely heavily on specific tools and routines to keep my setup sounding professional. A high-quality microphone cleaner is essential for regular cleaning, especially for USB and XLR mics exposed to dust and prolonged use. I prefer to use a gentle microfiber cloth combined with a specialized electronics cleaning spray to remove dirt without damaging sensitive components.
How do I maintain my gear over time?
Firstly, routine inspection is vital. Every few months, I check for any loose connections, frayed cables, or dust accumulation. For cables, I utilize a cable tester to ensure signal integrity, which prevents unexpected noise issues during live streams. Additionally, investing in a shock mount helps reduce mechanical vibrations that can degrade sound quality over time. A good practice I follow is to store microphones in their protective cases when not in use—this prevents physical damage and maintains their internal components. For XLR mics, I perform periodic clean gain adjustments using an external preamp to stay dialed in for optimal sound. As for software, regularly updating your digital audio workstation (DAW) plugins and firmware ensures compatibility and bug fixes, which can indirectly impact sound quality.
Scaling up your setup for long-term success
If you’re planning to expand your voice recording or streaming environment, investing in modular gear that offers easy upgrades is wise. Consider switching to higher-quality XLR microphones compatible with a versatile audio interface. This flexibility lets you refine your setup gradually, focusing on improving acoustics, accessories, and software integration. Additionally, keeping an eye on upcoming trends like integrated digital mic components or AI-powered noise suppression can future-proof your system. For instance, recent studies show that AI-driven noise suppression tools can cut background noise by up to 70%, making even modest setups sound pro (source). Regularly experimenting with these tools on your recordings can elevate your production quality without hefty hardware investments. To get started, test out a noise gate plugin combined with a dynamic EQ—it’s a game-changing combination for maintaining clear, professional sound during long editing sessions. Keep your gear in top shape, and your voice will continue to stand out in all your streams and recordings.
What I Wish I Knew About Mic Setup Early On
- I underestimated the power of room acoustics; simple fixes like hanging blankets made my recordings instantly clearer and more professional.
- Proper microphone placement isn’t just about distance—it’s about angles and angles—small adjustments yielded big improvements in clarity.
- I thought investing in high-end gear was the key, but mastering the small tweaks in gain, EQ, and placement often trumps fancy equipment.
- Monitoring in real-time with quality headphones prevented costly mistakes and kept my audio consistently on point.
- Room treatment is often overlooked but can make or break your voice quality—don’t ignore the echo and reverb issues.
My Toolkit for Voice Perfection
- Microphone Cleaner: Regular cleaning keeps my gear pristine and prevents static glitches, ensuring reliable performance.
- Value-Oriented Audio Interface: Budget-friendly but high-quality, it translates my mic’s signal cleanly and minimizes noise.
- Soundproofing Materials: Blankets and foam panels are cheap investments that drastically reduce echo and reverb in my space.
- Monitoring Headphones: Critical for real-time adjustments—accuracy in monitoring is essential for professional sound.
You Hold the Power to Elevate Your Voice
Remember, the journey to professional-quality sound doesn’t require breaking the bank—it’s about understanding your gear and environment. Keep experimenting, stay curious, and your voice will captivate your audience in ways you never imagined. The future of voice recording and streaming is bright, and with these insights, you’re more prepared than ever to lead the way. Now, it’s your turn—what’s the biggest audio challenge you’ve faced, and how did you tackle it? Share below and let’s grow together!