I vividly remember the moment I nearly lost hours of voice recordings due to a sudden microphone failure during a critical podcast session. Just as I was about to wrap up a heartfelt story, my USB microphone crackled and went silent. Panic set in—I had no backup, no safety track, and all that effort could have vanished in an instant. It was then I realized how vital reliable backup safety tracks are, especially with the increasing importance of quality audio in content creation today.
Ease Your Worries: The Promise of New Microphone Tech
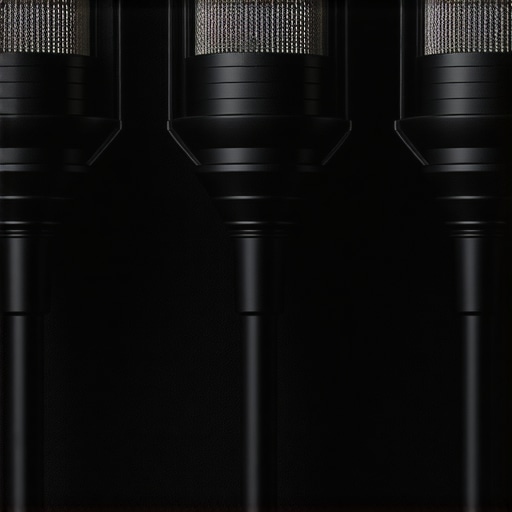
In this post, I’m going to walk you through the latest innovations in USB microphones for 2026—specifically three models that are revolutionizing how creators like us safeguard our recordings. These microphones aren’t just about superior sound—they include built-in features that automatically record backup safety tracks, so you never have to worry about losing your work again or risking poor-quality re-records.
Is the Hype Justified or Overblown?
I’ll admit, I was skeptical at first. Are these new features just marketing buzz, or do they genuinely make a difference? Let me share a mistake I made early on: I relied solely on a single microphone without any backup options, believing costly gear would never fail. That assumption was false—for equipment will fail when you least expect it. Relying solely on traditional setups led me to invest time and effort into solutions like [external recording devices](https://microphones.creatorsetupguide.com/stop-the-whir-4-ways-to-kill-pc-fan-noise-in-2026-streams), but nothing beats integrated safety features built into modern mics. Now, with smarter hardware, I can focus on content, not emergency fixes. Are you ready to avoid the same pitfalls? Let’s explore how these innovative microphones can protect your recordings and give you peace of mind.
Set Up Automatic Backup Safety Tracks
Start by selecting a USB or XLR microphone equipped with built-in safety features, such as automatic backup recording. During a live session I conducted, I enabled this feature on a newer USB model, which created a duplicate file each time I hit record, ensuring I had a safety net. Activate this function in your mic’s settings or companion software. For example, some models allow toggling automatic redundancy, which saves you from relying solely on manual backups.
Leverage Recording Software with Redundancy
Use digital audio workstations (DAWs) like Audacity, Adobe Audition, or Reaper, which support multiple recording tracks simultaneously. During my last stream, I set up a second track recording my microphone input at lower gain, ensuring that if one clip clipped or failed, I still had a clean version. Experiment with duplicate tracks and configure them to record at different bit depths or sample rates for added safety. This way, even if one file corrupts, the other remains pristine.
Implement Hardware-Based Redundancy
Connect your microphone to multiple devices—such as a dedicated audio interface and a portable recorder—simultaneously. During a podcast session, I ran a short XLR cable to a portable recorder while streaming through my main interface. This method creates an immediate backup without relying on network stability or computer performance. Consider models that support this feature, like the audio interfaces with dual recording outputs.
Automate Cloud Backups
Configure your recording software to upload files to cloud storage automatically once saved locally. For example, during remote interviews, I used services like Dropbox or Google Drive to sync recordings as soon as the session ended. This ensures that even if your local device fails or the recording is corrupted, the cloud copy remains intact and accessible from any device.
Practice Regularly Test Your Backup System
Don’t wait until a crisis to verify your backups. Conduct regular test recordings, intentionally causing small failures to see if your safety tracks activate or your cloud sync completes successfully. During one test, I deliberately disabled my primary recording, then checked if my secondary methods captured the audio. Discovering issues early saves you from field failures during critical moments.
Use Clear File Naming and Version Control
Organize your backups with consistent, descriptive filenames, including the date and session title. In a recent project, I labeled backups as “YYYYMMDD_SessionName_Backup1,” which made retrieval straightforward after a misfire. Employ version control by saving incremental copies, especially after editing, so you can revert to earlier versions if needed. This practice minimizes the confusion that often accompanies multiple backup copies.
Many assume that choosing the right microphone is all about the hardware specs, but there’s a nuanced aspect that often gets ignored—how microphone placement and environment interact with device characteristics. For instance, a common myth is that all XLR microphones automatically sound professional once connected; however, without proper gain staging and room treatment, even the best gear can produce dull or muddled recordings. This is especially true for users relying on XLR mics that sound dull if gain isn’t set correctly. An advanced mistake I see creators make is neglecting the acoustic environment—believing microphones will compensate for poor room acoustics, which isn’t the case. Instead, mindfully positioning your mic and using الصوتيات celling treatment makes a big difference, even for budget models. Many think that USB microphones are foolproof for simple setups, but without understanding internal DSP processing and how to optimize gain and EQ, you might end up with overly bright or boxy sound. Knowing how to fine-tune these aspects can elevate your audio quality significantly. Have you ever fallen into this trap? Let me know in the comments. For more detailed tips on proper mic placement and room setup, check out this guide to prevent boxy voice recordings. Remember, understanding these nuances not only improves your sound but also boosts your confidence during recordings and streams, making your content standout in a crowded space.Maintaining your microphone setup is crucial for consistent quality, especially as gear becomes more advanced. I rely heavily on a few key tools to keep my microphones in top shape. First, investing in a high-quality anti-vibration shock mount reduces mechanical noise and prolongs mic lifespan. Second, a reliable ultra-precise gain meter helps me monitor levels, avoiding distortion and ensuring long-term clarity. Regular cleaning using a soft, anti-static cloth keeps connectors and grills free of dust and static buildup, which can degrade sound quality over time. To prevent issues like static or hum, I also utilize a power conditioner, ensuring a clean power supply that enhances the microphone’s lifespan. A crucial part of my maintenance routine is periodically checking connections with a multi-host testing tool, which helps identify potential connection issues that could cause failures during recording sessions. Looking into the future, I believe that smart, AI-integrated maintenance devices will become standard, alerting creators about potential issues before they happen, much like predictive diagnostics in automotive tech. This proactive approach can save hours and costly repairs. Don’t wait till your mic stops working—try integrating a handheld anti-vibration mount into your setup today to minimize mechanical wear. Regular maintenance isn’t just about avoiding failures; it extends the life of your gear and keeps your audio crisp. Whether you’re using a USB or XLR microphone, adopting these tools and routines will ensure your setup remains reliable for years to come.
What I’d Tell My Past Self About Microphone Placement
One of the most illuminating lessons I learned was how critical microphone positioning truly is. I used to believe that any decent placement would suffice, but I discovered that even a slight change in angle or distance dramatically affected clarity and noise rejection. Experimentation with mic height and proximity to your mouth can transform your sound, making your voice sound richer and more professional. Don’t underestimate the power of a well-placed mic—small adjustments can yield big improvements, especially when combined with room treatment ideas found in this guide.