I’ll never forget the moment I recorded my first podcast episode. I was thrilled, microphone set up perfectly, ready to deliver my best. But as soon as I hit ‘record,’ I heard everything—it’s like my microphone had a mind of its own. Background noise, keyboard clicks, even my dog’s snoring in the next room. It was embarrassing, frustrating, and a stark wake-up call. I realized I wasn’t alone in this struggle; many content creators face the same problem. The truth is, despite all the advancements in USB microphones, they still tend to pick up every little sound—sometimes to the point of unusability.
Discovering the Hidden Challenges of USB Microphone Audio
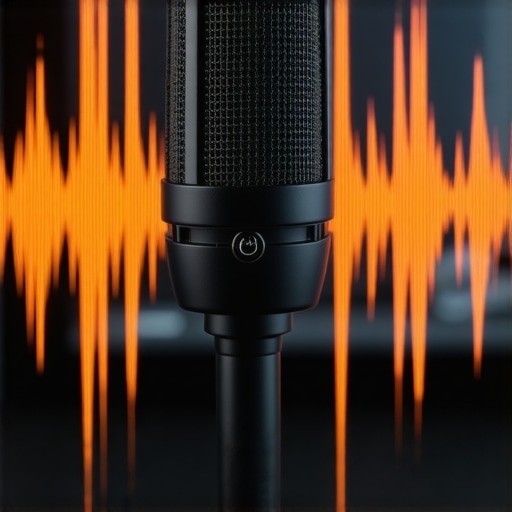
Is Your Microphone Really Working for You? Think Again.
Early on, I made a critical mistake—I assumed that buying a decent USB mic would automatically deliver professional sound quality. Spoiler alert: it doesn’t. The environment, setup, and microphone choice all play vital roles. Recognizing this can save you a lot of trouble down the line. Did you know that according to audio engineering experts, environmental noise can reduce your recording quality by up to 80% if not properly managed? That was a shocker for me, and it should be for you too. So, if you’ve been battling background noise or poor clarity, keep reading because I’ll show you how to tackle this head-on. Whether you’re into podcasting, streaming, or voice recording, these fixes will help you reclaim control over your sound environment and ensure your voice shines through clearly.
Secure a Stable Mounting and Eliminate Vibrations
Start by attaching your microphone to a sturdy, vibration-resistant stand. I once used a makeshift desk clamp, which inadvertently transferred desk noises into my recordings. Switching to a shock mount or a boom arm with shock absorption drastically reduced handling noise. Think of it like suspending a microphone on a trampoline—it keeps unwanted vibrations from reaching your mic capsule. This is crucial whether you’re using an microphone for voice recording or streaming. Proper mounting serves as the foundation for professional sound quality.
Control Your Recording Environment for Crisp Audio
Seal the Room
Next, assess your space. Hard surfaces reflect sound, creating echoes that muddy your audio. I experimented by placing blankets and foam panels — not just foam but thick, dense materials — to absorb reflections. This space treatment is like turning your room into a mini recording studio. For best results, focus on reducing sound bounce rather than just adding soundproofing foams — doors, windows, and furniture matter more than the cheap foam panels often marketed for this purpose. Check out this soundproofing guide for actionable tips.
Optimize Microphone Placement for Clarity
Position your microphone correctly. Place the mic about 6-12 inches from your mouth, slightly off-axis to avoid plosive sounds—those sudden pops from ‘P’ and ‘B’ sounds. I once recorded an episode where I was too close, causing harsh plosives and muffled voice. Using a pop filter became essential—think of it as a windshield for your voice. Adjusting your distance and angle can make a significant difference in captured quality, especially for podcast or streaming microphones. This simple step transforms your raw voice into broadcast-worthy audio.
Set the Right Recording Levels
Monitor your gain settings. Too high, and you risk distortion; too low, your voice gets lost in the noise. Use your recording software’s meters or hardware gain knobs to aim for peaks around -6 dB. During my first test recording, I kept clipping because I ignored levels; after lowering the gain, the audio was clearer, with less post-editing. Remember, your goal is natural, strong voice without distortion. For guidance, check out this level-setting tutorial tailored for beginners.
Reduce Background Noise with Proper Settings and Software
Close windows, turn off fans, and consider using noise reduction plugins during post-processing. I also used software noise gating—settings that mute quiet sounds below a certain threshold—avoiding continuous hums or keyboard clicks. Nowadays, many streaming mics have built-in noise suppression, but proper gain control amplifies their effectiveness. This combo ensures your voice remains clear, even if your recording environment isn’t perfect. Dive into this noise reduction concepts for more tips.
Test and Tweak Before Final Recording
Always do a test recording—speak naturally for 30 seconds to a minute. Listen critically, preferably with good headphones. If you detect background noise, distortion, or muffling, go back and adjust. I recommend creating a checklist: check placement, levels, environment, and software settings. Incremental adjustments might seem trivial but cumulatively elevate your audio quality to professional standards. For detailed testing protocols, visit this testing and calibration resource.Many content creators assume that choosing a popular microphone model or type guarantees professional results, but that’s a misconception that can lead to costly mistakes. For instance, the belief that an expensive XLR microphone automatically delivers superior quality is widespread, yet in practice, the environment and setup are just as critical. As expert audio engineers highlight, even top-tier microphones can underperform if not paired with proper acoustics and proper placement, underscoring the importance of holistic setup knowledge. Moreover, a common myth is that USB microphones are inherently inferior to XLR setups. While historically true due to complexity and control, modern USB mics like those found in top-choices for 2024 blur this line, offering studio-quality sound for less hassle. Another advanced pitfall is neglecting the impact of *preamp gain* and *clipping*. Many overlook that setting gain too high causes distortion, a mistake that’s avoidable with careful monitoring and knowledge of hardware levels—crucial for achieving that broadcast-quality clarity. Furthermore, some creators fall prey to the misconception that darker or more “natural” microphones always sound better in every context. The truth is, microphone frequency response tailoring can make a significant difference, especially when paired with the right equalization, as discussed in this comprehensive guide. Be cautious of the trap where insufficient acoustical treatment leads to echo and room noise, which even the most expensive mic cannot entirely compensate for. The secret lies in understanding the nuances of room correction—such as using diffusers and bass traps—beyond simple foam panels, as explained in soundproofing strategies for 2026. Lastly, for those stepping into streaming or voiceover work, selecting the right microphone is just the beginning. Advanced settings, such as applying a subtle high-pass filter or compression, can dramatically improve clarity and presence. These techniques are often overlooked by beginners but are essential for polished output. So, do you know which of these nuanced pitfalls you might be missing? Let’s dig deeper—share your experiences below!
Keep Equipment in Peak Condition for Consistent Quality
Ensuring your microphone remains reliable over time is crucial for maintaining professional audio standards. Regularly inspecting your setup for wear and tear, cleaning connectors with contact cleaner, and keeping your environment free of dust can prevent common issues. For instance, dust accumulation on USB ports or XLR connectors can lead to signal loss or noise problems. I personally use a small, anti-static brush to gently clean my microphone grille and connectors monthly, which keeps my audio clear and consistent. Investing in a dedicated dust cover for your microphone during downtime further prolongs its lifespan, saving you money and annoyance down the line.
Use Diagnostic Tools to Detect Problems Early
Monitoring your audio with specialized software helps catch issues before they affect your recordings. I recommend tools like audio analyzers or level meters that provide real-time feedback on your microphone’s output levels and frequency response. These tools assist in identifying clipping, unwanted noise, or signal drops, allowing you to tweak your setup proactively. For example, I run regular test recordings and analyze the waveform to ensure my gain settings stay optimal; this habit has prevented many avoidable distortions.
Keep Your Software Updated for Compatibility and Security
Firmware updates for your microphone’s drivers or software can enhance performance, fix bugs, and add features. Manufacturers often release updates that improve noise suppression algorithms or compatibility with new operating systems. I check manufacturer websites quarterly and enable automatic updates when available. Staying current with your software also minimizes security vulnerabilities, especially if you’re using third-party plugins for post-processing or noise reduction. Regular updates ensure your setup remains secure and efficient, supporting long-term reliability.
Scaling Your Setup for Growing Demands
As your audience or workload expands, upgrading or adding equipment becomes necessary. I started with a single, reliable microphone but later integrated a high-quality XLR mic for studio-level recordings. To support this, I invested in a compact audio interface and balanced cables, which improved my sound quality and reduced noise. When scaling, consider your existing environment—adding acoustic treatments and ensuring your interface supports multiple inputs can streamline expansion. Keep in mind, long-term success isn’t just about equipment but also about a clear plan for maintenance and upgrades.
How do I maintain my microphone’s performance over time?
Develop a routine to check and clean your gear, monitor your audio with diagnostic tools, and stay updated on firmware and software. This proactive approach minimizes unexpected issues and sustains top quality. For expert tactics, see this soundproofing and maintenance guide. Embrace these practices, and you’ll enjoy consistently professional audio for years to come. Don’t forget to try implementing a regular cleaning schedule or installing the latest firmware updates—small steps that make a big difference in your long-term setup.
What I Wish I Knew Before My First Recording
One of the most impactful lessons I learned was that even the best microphone can’t save you if your environment isn’t properly curated. Investing in a high-quality XLR microphone or a top USB model is just part of the story; knowing how to treat your space and set your levels correctly makes all the difference. Don’t fall into the trap of thinking gear alone will elevate your sound without the right setup.
How Discovering the Hard Way Changed My Approach
After countless frustrating recordings, I realized that my room’s acoustics were undermining my efforts. Adding dense acoustic panels and a shock mount transformed my audio quality overnight. Remember, even a stellar professional microphone needs a controlled environment. Practical solutions like this bridge the gap between amateur and professional sound.
Why Microphone Placement Could Make or Break Your Audio
Positioning is often overlooked, but placing your mic about 6-12 inches from your mouth and using a pop filter can eliminate harsh plosive sounds and improve clarity. I found that adjusting my placement slightly off-axis and experimenting with distance elevated my recordings from decent to broadcast quality. Little tweaks here pay off big in the final audio.
From My Mistakes to Better Sound: The Power of Testing
Before hitting record, I always do a quick test. Listening critically, I check for background hums, clipping, and room echo. This habit saves hours of post-production and ensures my voice is heard clearly. Incorporating regular testing routines reminded me that consistent quality comes from consistent effort.
The Hidden Benefit of Investing in Proper Acoustic Treatment
It’s tempting to assume that a favorite streaming mic is enough, but untreated rooms cause echo, muffling, and background noise. Going beyond foam panels, like adding bass traps and diffusers, truly refines your sound. This investment pays dividends when your audience can finally hear you crystal clear, every time.
Insider Wisdom: Lessons That Took Me Years to Learn
- High-quality gear is essential, but understanding your environment controls is equally critical. I once spent a fortune on a mic only to realize my room ruined the audio. Now, I prioritize acoustics first.
- Proper placement and test recordings are your best friends. Those few seconds of setup prevent hours of editing and re-recordings later.
- Continuously learn and adapt. Technology evolves, and staying informed about the latest in voice recording gear keeps your sound cutting-edge.
- Maintenance matters. Regularly cleaning your equipment and updating drivers keeps your setup reliable, reducing unexpected issues during crucial recordings.
My Ultimate Arsenal for Consistent Recording Success
- Consider tools like the best XLR microphones for studio-quality sound, paired with a stable audio interface for flawless connections.
- Use software noise reduction plugins during post-processing to tidy up residual background noise.
- Stay on top of firmware updates by bookmarking your mic manufacturer’s site—this simple habit prevents many avoidable glitches.
- For acoustics, my pick is dense foam combined with bass traps; it effectively absorbs troublesome reflections. For guidance, the soundproofing strategies that revolutionized my setup are invaluable.
Keep Moving Forward and Improving Your Voice
Getting your microphone setup just right is a journey, not a destination. Each tweak and upgrade brings you closer to broadcasting professional-quality audio. Remember, the real magic happens when you combine the right gear, environment, and consistent effort. Your voice deserves that clarity, and with patience and persistence, you’ll find yourself sounding better than ever.